


Table of Contents
- Tools and Materials for Repairing Poncho Seams
- Signs of Delamination in Waterproof Gear
- Step-by-Step: How to Repair Waterproof Poncho Seams
- Choosing the Best Seam Sealer for Nylon Ponchos
- How to Re-Waterproof a Rain Poncho
- Common Mistakes That Ruin Poncho Seam Repairs
- Frequently Asked Questions
Last Updated: September 11, 2026
Tools and Materials for Repairing Poncho Seams
A seam repair on a waterproof poncho needs four things: a clean surface, the right sealer, a way to apply it precisely, and time to cure. Skip any one of those and the patch will peel within a season. Seam failure almost always traces back to rushing the prep work rather than a bad product.
Here's what to have on hand before you start:
- Isopropyl alcohol (70% or higher) and clean lint-free cloths
- Seam sealer formulated for nylon or polyester, not silicone caulk
- Small applicator brush or a squeeze tip with a fine nozzle
- Painter's tape for masking edges on visible seams
- Hairdryer or heat gun on a low setting for curing
- Clean water and a spray bottle for the leak test
The Federal Trade Commission's guidance on textile labeling is worth a quick read if you want to confirm what your poncho's care tag actually permits, since some coatings react badly to alcohol.
Work in a ventilated space. Seam sealers off-gas, and a closed garage in July is a bad place to spend an afternoon. Lay the poncho flat, inside facing up, and let it relax for a few minutes so the fabric isn't stretched when you seal it.
Signs of Delamination in Waterproof Gear
Delamination is the separation of a waterproof membrane or coating from its backing fabric, and it's the single most common reason a poncho stops keeping rain out. You'll usually spot it before you feel it. The fabric looks bubbled, feels tacky, or makes a crinkling sound when you fold it.
Watch for these signals:
- Bubbling or rippling along the inside surface, especially near seams
- A sticky or gummy feel when you run a hand across the interior
- Flaking or white residue on your fingers after handling
- Visible separation at fold lines and stress points
- Water beading on the outside but soaking through at the seams
If the coating is peeling in large sheets, a seam repair won't save the garment. Small, localized delamination around a seam is fixable. Widespread failure across the whole panel means it's time to replace the poncho.
That distinction matters more than most guides admit. People waste sealer on gear that's already past saving, then blame the product when it fails again.
Step-by-Step: How to Repair Waterproof Poncho Seams
Repairing poncho seams takes about 30 minutes of active work plus 12 to 24 hours of cure time. The process is straightforward: clean the seam, seal it, then let it cure fully before testing.
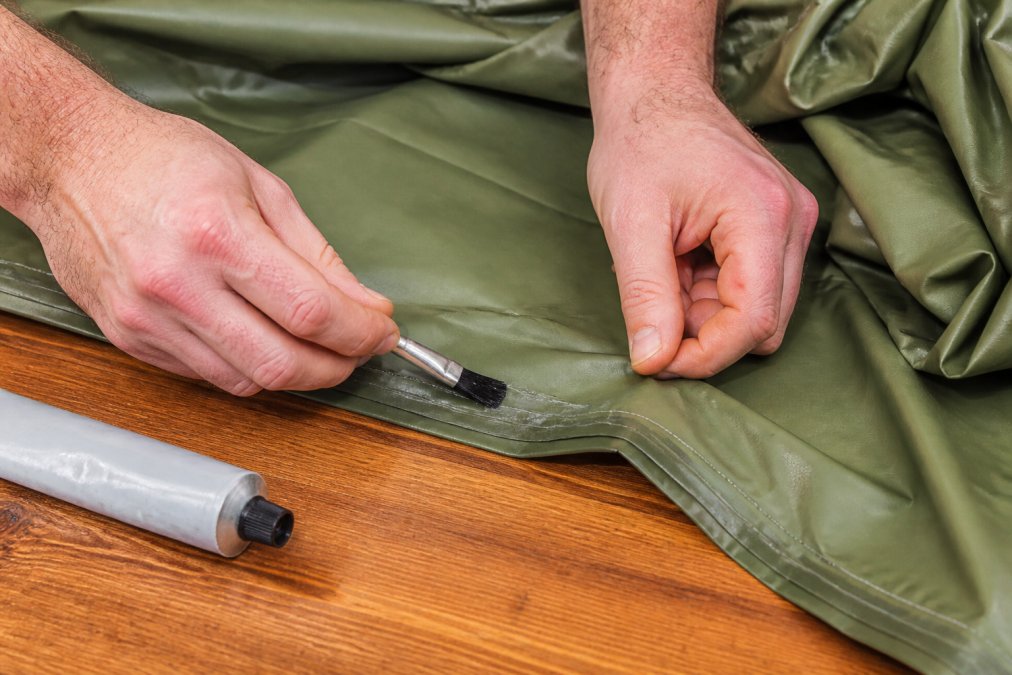
Step 1: Clean and Dry the Seam
Wipe the seam with isopropyl alcohol and a lint-free cloth. Work along the full length of the seam, inside and out, and let it air dry completely. Any oil, dirt, or old sealer residue left behind will prevent the new layer from bonding.
A common mistake is sealing a damp seam. Even a little moisture trapped under the sealer causes it to lift within weeks.
Step 2: Apply Seam Sealer
Apply a thin, even bead of sealer directly over the seam line on the inside of the poncho. Use the applicator brush to spread it about 0.5 cm to 1 cm wide on each side of the stitch line. Thin coats bond better than thick ones.
Let the first coat tack up for the time your product label specifies, then apply a second thin coat. Two thin layers outperform one heavy layer every time.
Step 3: Cure and Test
Let the sealer cure fully, typically 12 to 24 hours depending on humidity and temperature. Warm, dry conditions speed this up. Once cured, spray the poncho with water and check for seeping along the repaired seam.
If water still gets through, the seam wasn't fully covered. Clean the area again and repeat the seal.
Choosing the Best Seam Sealer for Nylon Ponchos
The best seam sealer for nylon ponchos is a polyurethane or silicone-based product made specifically for synthetic outdoor fabrics. General-purpose silicone caulk from a hardware store is not the same thing and will not flex with the fabric.
Sign Up For Our Newsletter for 10% OFF →
Match the sealer to the material:
- Polyurethane sealers bond aggressively to nylon and polyester, cure flexible, and handle repeated folding
- Silicone sealers work well on silicone-coated fabrics and stay flexible in cold weather, but can be harder to apply neatly
- UV-curing sealers are convenient for quick field repairs but cost more per repair
Check the poncho's original coating before buying. A silicone-based sealer won't bond to a polyurethane-coated fabric, and vice versa. When in doubt, test on a hidden interior patch.
| Sealer Type | Best For | Cure Time | Notes |
|---|---|---|---|
| Polyurethane | Nylon, polyester shells | 12-24 hours | Strong bond, flexible |
| Silicone | Silicone-coated fabrics | 6-12 hours | Cold-weather flexible |
| UV-curing | Field repairs | Minutes in sun | Higher cost per use |
If you're not sure what your poncho is coated with, REI's guide to waterproof breathable fabrics breaks down the common coating types and how to identify them.
How to Re-Waterproof a Rain Poncho
Re-waterproofing a rain poncho means restoring the durable water repellent finish on the outer fabric, not just patching seams. Even a perfectly sealed poncho will soak through if the outer surface has stopped beading water.
Start by washing the poncho with a technical fabric cleaner, not regular detergent. Detergent leaves residue that blocks the new DWR from bonding. Rinse thoroughly and let it dry.
Then apply a spray-on or wash-in DWR treatment made for synthetic outdoor fabrics. Spray-on gives you more control and works better on ponchos with taped or sealed seams. Apply in thin, even passes and let it cure per the label.
A quick test: sprinkle water on the surface. If it beads and rolls off, the finish is working. If it soaks in flat, reapply.
Common Mistakes That Ruin Poncho Seam Repairs
Most failed repairs come down to five mistakes, and every one of them is avoidable.
- Sealing a dirty or damp seam. The sealer can't bond to a contaminated surface.
- Using the wrong sealer type. Polyurethane and silicone don't mix.
- Applying one thick coat instead of two thin ones. Thick sealer skins over and stays tacky underneath.
- Skipping the cure time. Testing too early disturbs the bond before it sets.
- Ignoring widespread delamination. Sealing a seam on a failing coating just delays the inevitable.
The fix for all five is patience and a clean workspace. Slow down, prep properly, and let the product do its job.
If you're repairing gear regularly, keep a small field kit with alcohol wipes, a tube of sealer, and a brush. The American Hiking Society's trail maintenance resources offer practical guidance on gear care for people who spend real time outside.
At Dragoon Unlimited, we build gear for people who need it to work when it counts, and we stand behind what we put our name on.
Seam failure is one of the few gear problems you can fix yourself with a clean rag, a tube of sealer, and an afternoon. But if your poncho is delaminating across the whole panel, no amount of sealer will bring it back, and that's the moment to replace it with something built to last. Dragoon Unlimited makes rugged, field-tested outdoor gear designed with input from the people who use it, backed by fast shipping and a commitment to supporting veteran organizations with every purchase. Get started with Dragoon Unlimited and gear up for your next mission.
Frequently Asked Questions
Can you use duct tape to fix a leaking rain poncho?
Duct tape can stop a leak temporarily, but it is not a permanent fix. The adhesive breaks down with moisture and temperature changes, leaving sticky residue that makes proper repair harder. For a field expedient patch, use it on a clean, dry surface and replace it with seam sealer as soon as possible. A dedicated seam sealer for nylon ponchos bonds to the fabric and flexes with it, so the repair lasts through repeated folding and packing.
How long does seam sealer take to cure on outdoor gear?
Most seam sealers need 12 to 24 hours to cure fully at room temperature. Some fast-drying formulas set in 2 to 4 hours, but they still need a full day before you pack or wear the poncho. Humidity and cold slow the process, so give it extra time in those conditions. Test the seam with a light water spray before heading out. If water beads and rolls off, the seal is ready.
Is it worth repairing a cheap rain poncho or should I replace it?
If the fabric itself is still intact and only the seams leak, repair is worth it. A tube of seam sealer costs far less than a new poncho and takes about 15 minutes. Replace the poncho when the coating is peeling across large areas, the fabric tears easily, or delamination has spread beyond the seams. For gear you rely on in the backcountry, a poncho with widespread delamination is no longer trustworthy.
How do I know if my poncho seams are failing?
Look for visible gaps, peeling tape, or white streaks along the seam lines. Run your fingers along the inside seams; if the coating feels rough or flakes off, the seal is breaking down. The clearest test is wearing the poncho in light rain for 10 minutes. If you feel moisture along the shoulders or hood seam, the waterproofing has failed there. Catching it early makes the repair simpler.


