


Table of Contents
- Why Reinforced Stitching Prevents Gear Failure
- How Load Distribution and Stress Concentration Damage Stitches
- Bar Tack Stitching Strength at Critical Stress Points
- Thread Tension, Material Selection, and Stitch Formation
- How to Inspect Gear Seams Before Failure Occurs
- Outdoor Gear Seam Repair and Prevention Techniques
- Survival Gear Maintenance Checklist for Field Durability
- Frequently Asked Questions
Last Updated: October 17, 2026
Why Reinforced Stitching Prevents Gear Failure
Reinforced stitching prevents gear failure by distributing mechanical loads across multiple thread strands instead of concentrating stress on a single seam. Proper stitch formation and thread tension make the difference between gear that lasts decades and equipment that fails in the field.
Under heavy load or extreme conditions, seams take the punishment. Standard stitching creates a single weak point; reinforced stitching spreads load across a wider area, reducing the stress concentration that causes fabric to tear, threads to snap, and gear to fail.
The mechanism is simple: more thread in the same space means more resistance to mechanical load. One rope strand breaks easily; braid ten together and you can hold serious weight.
This applies everywhere gear gets stressed: backpack straps, shelter attachment points, pack seams under load, and any junction where two pieces meet. The difference between a repair that holds and one that fails often comes down to stitch formation and thread resistance.
How Load Distribution and Stress Concentration Damage Stitches
Stress concentration happens when load distributes unevenly across a seam. A weak stitch pattern forces all the tension into a tiny area, and that's where stitches break.
When you overload a pack or expose fabric to repeated stress, the weakest point fails first. A standard lockstitch handles normal conditions, but add friction, repeated flexing, or heavy load and that single line of thread starts to fray.
Reinforced stitching prevents this by creating multiple load paths. Instead of one thread carrying all the weight, you have several; when one strand wears, the others still hold.
Load conditions matter. A shelter in a windstorm experiences constant stress. A pack strap under a 60-pound load has concentrated pressure at attachment points. A backpack seam flexing with every step faces repetitive stress. Each scenario demands different thread resistance and stitch patterns.
The real problem emerges when load distribution fails: uneven pressure creates stress concentration points where pitting and scuffing start and threads begin to break.
Bar Tack Stitching Strength at Critical Stress Points
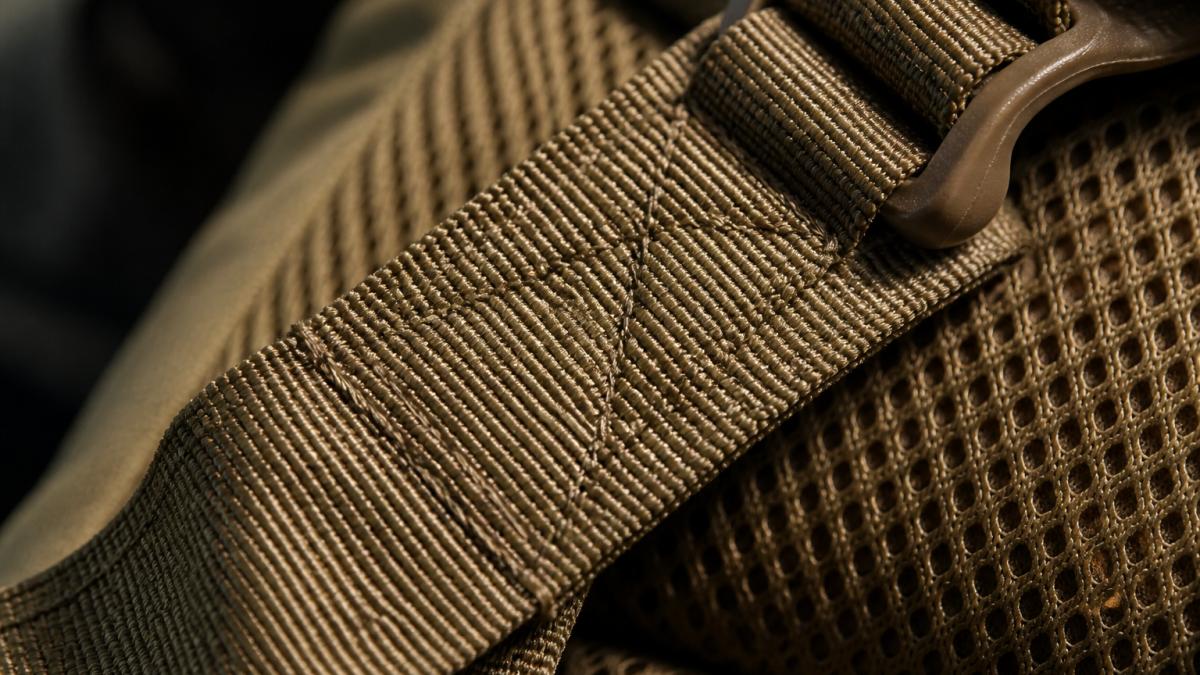
Bar tack stitching is a densely-woven pattern that provides maximum thread resistance at high-stress areas. It's the standard for reinforced stitching in load-bearing gear because it concentrates multiple stitches in a small space.
Instead of a single line of stitches, the needle moves back and forth over the same area repeatedly. Each pass adds another thread to the load path, producing a thick, reinforced zone that handles serious mechanical load.
Bar tack strength comes from density: a typical bar tack has 8 to 15 needle passes in a half-inch space, or 16 to 30 thread strands holding the same seam, versus just 2 threads in a standard lockstitch.
The best places for bar tacks are exactly where gear fails first:
- Pack strap attachment points
- Shelter grommet reinforcement
- Backpack seam corners
- Pocket attachment zones
- Load-bearing junction points
When you inspect gear, look for these reinforced zones. Gear without bar tacks at critical stress points will fail under real load.
Thread Tension, Material Selection, and Stitch Formation
Thread tension, thread material, and stitch formation determine whether reinforced stitching actually carries load or just looks reinforced. Get any one wrong and the seam fails at a fraction of the thread's rated strength, no matter how many passes you add.
Thread tension. Tension controls how the needle and bobbin threads interlock inside the fabric. Correct tension locks the crossing point in the middle of the layers, so both sides share load. Too loose and the crossing point sits on the surface, where it abrades and the seam puckers; too tight and the thread stretches near its elastic limit before the seam sees working load, so it snaps early.
Thread material. Polyester is the default for load-bearing outdoor gear: it resists UV and moisture better than cotton and has low stretch under sustained load. Nylon is stronger for its weight but stretches more and degrades faster under prolonged UV, so it suits high-flex, high-shock seams more than sun-exposed ones.
Stitch formation. Stitch formation is the interaction of needle size, thread weight, and fabric weight. A needle too fine for the fabric deflects and creates skipped stitches; one too heavy punches oversized holes that weaken the fabric and let thread pull through.
The relationship matters more than any single setting. Perfect tension with the wrong needle still produces weak stitches, and the best thread ruined by loose tension still slips under load. Treat tension, material, and formation as one system, and verify it on scrap before it goes on gear you depend on.
How to Inspect Gear Seams Before Failure Occurs
Inspecting seams before failure prevents catastrophic breakdowns in the field. Look for early warning signs of stress concentration or wear.
Start with visual inspection under good light. Look for:
- Puckering or waviness in the seam (sign of improper thread tension)
- Gaps between stitches (sign of tension too loose)
- Broken threads or fraying (sign of material stress or wear)
- Discoloration where stitches meet fabric (sign of friction damage)
Run your fingers along the seam. A healthy seam is smooth and tight; rough texture or loose threads mean the thread is breaking down.
Check stress points specifically. Pack strap attachments, shelter grommets, and backpack corners show wear first; if those look good, the rest of the gear probably is too.
Sign Up For Our Newsletter for 10% OFF →
Flex the gear gently near seams and watch for movement between thread and fabric. If the thread slides under pressure, tension was too loose when sewn, and that seam will fail under real load.
Look for friction damage. Gear that rubs against sharp edges or rough surfaces shows wear patterns; if thread resistance is breaking down there, reinforce those spots before they fail completely.
Pull-test small areas if unsure: grab the fabric on either side of a seam and apply steady pressure. A solid seam should not give; if you feel movement, that seam needs attention before you rely on it in the field.
Outdoor Gear Seam Repair and Prevention Techniques
Most gear-failure advice stops at "inspect and repair." What's missing is a concrete procedure and a clear boundary: reinforced stitching protects fabric gear components, but it cannot repair damaged metal gear teeth, worn bearings, or a misaligned gear train.
Step 1: Diagnose what failed. Before you touch a needle, identify whether the failure is thread breakage, fabric tear, stitch loosening, or a mechanical problem elsewhere.
Step 2: Prepare the area. Clean and dry the seam. Remove loose thread ends and frayed fibers that would prevent new stitches from gripping. If the fabric is torn, trim loose edges so the patch lies flat.
Step 3: Select the stitch pattern by load and material. Match the reinforcement to the application rather than defaulting to one pattern:
- Backstitch: a hand-sewn or machine back-and-forth stitch that doubles thread density along a short seam. Good for light-to-moderate loads on pack seams and repair patches where a machine bar tack is not available.
- Bar tack: a dense, short run of zigzag or repeated stitches across a stress point. Best for strap attachment points, grommet reinforcement, and pocket corners where load concentrates in a small area.
- Box-X pattern: a square with an X through it, sewn at webbing-to-fabric junctions. Distributes load in four directions and is standard at pack strap and harness attachment points.
- Seam reinforcement (double-stitched seam): a second row of stitches parallel to the original seam. Adds redundancy along a long seam rather than at a single point.
Choose thread weight and needle size to match the fabric as described above, and use bonded polyester for any field-repairable load-bearing seam.
Step 4: Place reinforcement where load concentrates. Reinforce seam ends, attachment points, and corners first. A seam rarely fails in the middle; it fails where load transitions from fabric to hardware or from one panel to another.
Step 5: Sew and verify. Sew with consistent tension, then inspect: the seam should lie flat, stitches evenly spaced, fabric unpuckered.
Step 6: Know when stitching is not appropriate. Reinforced stitching is a fabric-and-webbing repair.
Prevention. Regular inspection catches problems before they become failures. Clean gear after use, especially after salt water, mud, or sand exposure, and dry it completely before storage. Store it cool and dry, away from direct sunlight, since UV weakens both thread and fabric. Keep gear within its design load limits, because overloading creates stress concentration no reinforcement can fully offset. Check seams seasonally even in storage, because thread and fabric degrade over time regardless of use.
Survival Gear Maintenance Checklist for Field Durability
A maintenance routine keeps gear reliable when it matters most. Check this list before and after each mission:
- Inspect all seams under good light for breaks, fraying, or gaps
- Check stress points (strap attachments, grommet zones) for wear
- Run fingers along seams to feel for rough spots or loose threads
- Flex gear near seams and watch for movement between thread and fabric
- Clean all dirt, mud, and salt residue from fabric and stitches
- Dry gear completely before storage
- Check for signs of friction damage or rubbing
- Verify that all bar tack reinforcements are intact
- Look for puckering or waviness indicating tension issues
- Test load-bearing seams with gentle pull pressure
After field use, inspect gear immediately. Damage found early is easier to repair; small problems become catastrophic failures if ignored.
Before deployment, inspect thoroughly. Test every seam, verify critical stress points have proper reinforced stitching, and replace any gear showing wear. Your life may depend on it.
Store gear with seams protected. Fold carefully to avoid stress concentration at creases, and don't stack heavy items on gear with seams under tension.
Check gear seasonally even if unused. Thread degrades, fabric weakens, and moisture and temperature changes stress stitches; regular inspection catches problems before they become failures.
Gear fails when seams fail. Reinforced stitching prevents that by distributing mechanical load across multiple thread strands instead of concentrating stress on a single point. At Dragoon Unlimited, we build every piece with bar tack stitching at critical stress points because we know what happens when gear fails in the field. Our shelters and packs use double-thread reinforced stitching, proper thread tension, and material selection matched to real-world load conditions. When you're counting on your gear to hold up, reinforced stitching isn't a luxury feature, it's the difference between equipment that works and equipment that fails. NFPA guidelines on protective equipment durability emphasize the importance of seam integrity in load-bearing applications. Get gear built to last.
Frequently Asked Questions
What does reinforced stitching mean in outdoor gear?
Reinforced stitching uses multiple passes of thread, bar tack formations, or double-thread stitches at stress areas to increase thread resistance and prevent broken stitches. In field conditions, reinforced stitching distributes mechanical loads across more thread contact points, reducing the risk of single-stitch failure at seams under tension, friction, or repeated flexing.
How does reinforced stitching help prevent gear failure?
Reinforced stitching prevents gear failure by resisting load concentration at seam weak points. When outdoor gear experiences mechanical load from overloading, friction, or stress concentration, standard stitching breaks first. Reinforced patterns like bar tacks spread that load across multiple threads and stitch formations, delaying fatigue life failure and protecting the underlying fabric from delamination or tear propagation.
Where should outdoor gear have reinforced seams?
Reinforced seams belong at load-bearing contact points: pack attachment straps, shelter anchor loops, stress areas where fabric meets hardware, and seams that experience repeated friction or bending. High-wear zones like backpack shoulder seams, Ridgeback shelter corner loops, and Woobie jacket pocket attachments require bar tack stitching or double-thread formations to withstand field durability demands.
How often should you inspect the stitching on survival gear?
Inspect survival gear stitching before each field deployment and after high-stress use. Look for broken stitches, thread resistance loss, or stitch defects at stress areas. In active field use, monthly visual checks catch early wear or pitting that signals fatigue life decline. Post-mission inspection after overloading or harsh conditions prevents catastrophic seam failure during your next mission.


