


Table of Contents
- What You'll Need to Make a DIY Woobie Jacket
- Choosing Poncho Liner Fabric and Materials
- Getting Your DIY Woobie Sewing Pattern and Measurements
- Layering Fabric and Insulation for Warmth
- How to Add Sleeves to a Blanket-Style Woobie
- How to Make a Woobie Hoodie with Hood and Closures
- Sewing the Fabric Layers and Finishing Seams
- Common Mistakes to Avoid When Building Your DIY Woobie Jacket
- Frequently Asked Questions
Last Updated: October 13, 2026
What You'll Need to Make a DIY Woobie Jacket
Building a DIY woobie jacket requires specific materials and tools. You'll need fabric, insulation, thread, and basic sewing equipment. The right supplies make the difference between a jacket that works and one that falls apart in the field.
Start with two fabric layers for your shell. Ripstop nylon or polyester works best because it resists tears and sheds moisture. Cotton blends are softer but less durable in rough conditions. Most builders choose ripstop for the outer layer and a lighter polyester for the lining.
For insulation, synthetic batting gives you warmth without bulk. Polyester insulation compresses well and dries faster than down if it gets wet. Choose a thickness between 1 and 2 inches depending on your climate needs.
Your sewing toolkit should include:
- Sewing machine capable of handling heavy fabric
- Thread rated for outdoor gear (polyester or nylon)
- Sharp fabric scissors or rotary cutter
- Measuring tape and ruler
- Pins or fabric clips to hold layers steady
- Needle for hand-finishing seams
- Seam ripper for corrections Properly sealing the finished seams remains a critical final step in waterproofing outdoor gear to ensure your jacket performs reliably in wet conditions.
Invest in outdoor-rated polyester or nylon thread that won't snap when your jacket takes a hit.
Choosing Poncho Liner Fabric and Materials
The poncho liner is the foundation of your woobie jacket. Authentic military poncho liner fabric is quilted nylon with a diamond stitch pattern. This quilting holds the insulation in place and prevents bunching.
Look for ripstop nylon or heavy-duty polyester with a DWR (durable water repellent) finish. The DWR coating sheds light rain and morning dew. Standard polyester without DWR will absorb water, adding weight.
Weight matters for field use. Aim for fabric in the 1.5 to 2.5 ounce per square yard range. Lighter fabric packs smaller. Heavier fabric lasts longer under hard use.
Your lining fabric should be soft against skin but still durable. Many builders use a lighter polyester or even cotton blend for comfort. The lining doesn't need water resistance since the outer shell handles that job.
Color choices affect visibility and function. Solid colors like olive drab or tan blend into most environments. Camouflage patterns work well if you plan field use. Bright colors are easier to spot if you need rescue or search operations.
Getting Your DIY Woobie Sewing Pattern and Measurements
A good pattern is your roadmap. You need measurements for body width, length, sleeve length, and hood depth. Poor measurements lead to a jacket that doesn't fit or drapes wrong.
Start by measuring a jacket that fits you well. Lay it flat on a table. Measure from shoulder seam to shoulder seam for width. Measure from the back neck down the spine to where you want the jacket to end.
For sleeve length, measure from the shoulder point down your arm to your wrist. Add 1 inch for comfort and movement. Sleeves that are too short restrict motion. Too long and they bunch at the wrist.
Sizing and Layout
Your pattern layout determines how much fabric you need. Lay out all pattern pieces on your fabric before cutting. This prevents waste and catches problems early.
Arrange pieces so the grain line runs vertically. Grain direction affects how fabric drapes and stretches. Consistent grain direction prevents puckering and uneven seams.
Allow extra space around each piece for seam allowance. Standard seam allowance is 0.5 inches.
Cutting and Seam Allowance
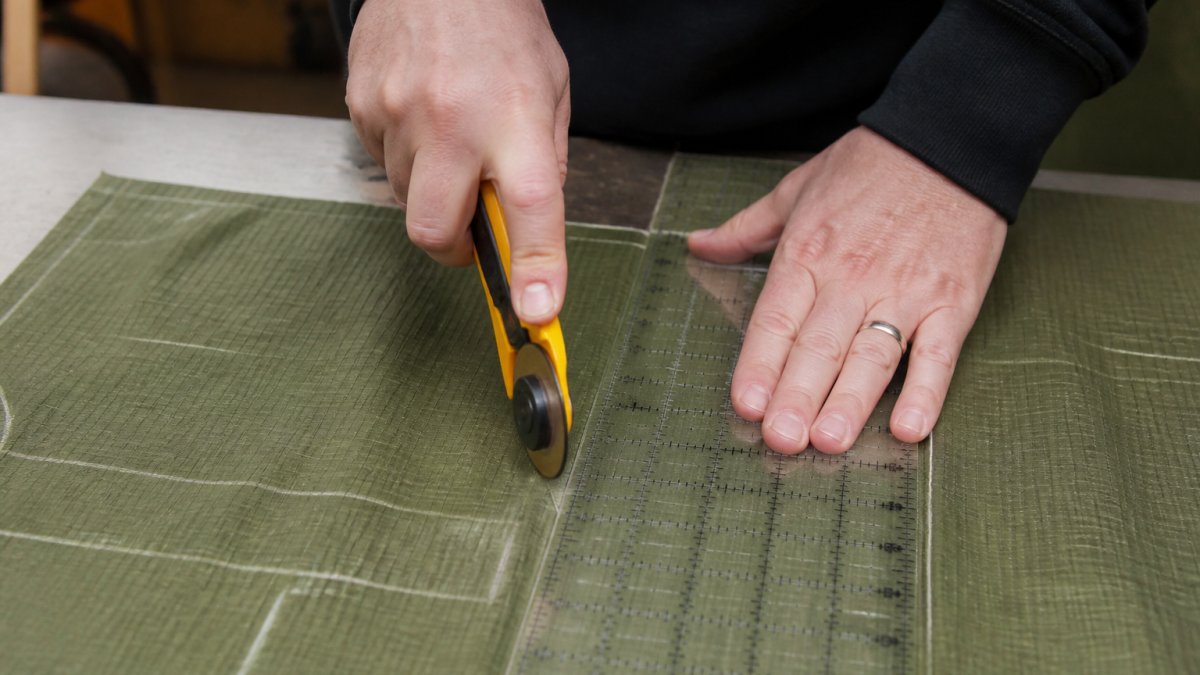
Sharp scissors or a rotary cutter make clean cuts. Dull blades fray edges and create uneven seams. If your scissors are dull, sharpen them or buy new ones before cutting.
Mark your seam allowance with chalk or tailor's pen before cutting. This guides your stitching and prevents mistakes. Cut slowly and follow your marks precisely.
When cutting insulation, use the same pattern but trim 0.25 inches off all edges. This prevents insulation from peeking out at seams. Thinner insulation at seams also makes the jacket more flexible at joints.
Layering Fabric and Insulation for Warmth
Layering creates warmth without weight. The standard approach uses three layers: outer shell, insulation, and lining.
Start with your outer shell fabric right-side up. This is the side that faces the world. Place your insulation on top of the shell with no gap. The insulation should cover the entire shell piece.
Next, place your lining fabric on top of the insulation with the right side facing down. You now have a sandwich: outer shell right-side up, insulation in the middle, lining right-side down.
Pin all three layers together using pins or fabric clips every 4 to 6 inches. This prevents layers from shifting while you sew. Shifted layers create puckers and weak spots.
Baste the layers together with long, loose stitches before final sewing. Basting holds everything in place and lets you catch problems before committing to permanent seams. Remove basting stitches after final seams are complete.
How to Add Sleeves to a Blanket-Style Woobie
Sleeves transform a blanket into a wearable jacket. Attaching them correctly prevents ripping at the armhole when you move hard or carry gear.
Start by creating the sleeve tube. Sew the front and back seam of each sleeve piece together with the right sides facing. This creates a tube. Trim the seam allowance to 0.25 inches and press flat.
Turn the sleeve right-side out. Press the seams again from the inside. This creates clean, finished edges inside the sleeve.
Mark the armhole on your jacket body. The armhole should sit roughly where your shoulder naturally bends. Too high and sleeves restrict movement. Too low and they hang loose.
Pin the sleeve into the armhole with right sides facing. Start at the top of the shoulder and work your way around. The sleeve head should fit snugly without puckering. If you see wrinkles, adjust pins until they disappear.
Sew the sleeve to the jacket using a 0.5-inch seam allowance. Go slowly at the curves. Backstitch at the start and end to lock stitches. Remove pins as you approach them.
Trim the seam allowance to 0.25 inches and finish the raw edges with a zigzag stitch or binding tape. This prevents fraying and extends the jacket's life.
Rhodesian Brushstroke Camouflage Smoking Jacket (Back in Stock ~ 01OCT26) →
How to Make a Woobie Hoodie with Hood and Closures
A hood adds protection and extends warmth coverage. The hood is two curved pieces sewn together and attached to the neckline.
Constructing the Hood
Cut two hood pieces from your pattern. Each piece should curve from the center front around to the back. The curve follows the shape of your head.
Sew the two hood pieces together along the back seam with right sides facing. Use a 0.5-inch seam allowance. This creates the back crown of the hood.
Turn the hood right-side out and press the seam flat. The hood now looks like half of a helmet.
Attach the hood to the neckline of your jacket. Mark the center front of both the hood and the jacket neckline. Pin the hood to the neckline starting at the center and working outward. Keep tension even to prevent bunching.
Sew the hood to the neckline using a 0.5-inch seam allowance. Go slowly around the curves. The stitching should be smooth and even.
Adding Front Closure and Cuffs
A front closure keeps the jacket closed against wind.
For cuffs, fold the sleeve opening up 1 inch and sew it down. This creates a finished edge and adds durability.
Alternatively, sew binding tape around the cuff opening. It also reinforces the cuff against tearing.
Sewing the Fabric Layers and Finishing Seams
All seams must be strong and sealed. Use a straight stitch with matching thread. Polyester thread blends with most colors and handles outdoor conditions well.
Sew all seams with a 0.5-inch allowance.
Backstitch at the start and end of every seam. Backstitching locks the thread and prevents unraveling. Go back 0.5 inches, then forward to the end point.
After sewing, trim all seam allowances to 0.25 inches.
Finish raw edges with a zigzag stitch or binding tape.
Press all seams flat after sewing. Use a medium iron setting on polyester and nylon.
Common Mistakes to Avoid When Building Your DIY Woobie Jacket
Mistakes cost time and materials. Learning from others' errors saves frustration.
Skipping the pattern. Cutting without a pattern leads to uneven pieces and poor fit. Spend time on your pattern. It's worth it.
Using cheap thread. Outdoor gear needs quality thread that won't snap. Cheap thread fails under stress. Invest in good thread.
Wrong seam allowance. Too narrow and seams split. Too wide and the jacket doesn't fit right. Use 0.5 inches consistently.
Shifting layers. Unbasted or poorly pinned layers slip during sewing. This creates puckers and weak spots. Baste everything first.
Ignoring grain direction. Fabric cut against the grain stretches wrong and looks sloppy. Always cut with grain running vertically.
Leaving raw edges. Unfinished edges fray and weaken fast. Seal all edges with zigzag stitches or binding.
Sleeves too tight. Measure twice. Sleeves that bind restrict movement and tear easily. Loose sleeves are better than tight ones.
Hood too small. A hood that doesn't cover your head is useless. Make it slightly larger rather than smaller.
Weak button attachment. Buttons that rip off defeat the purpose of a closure. Use strong thread and sew through each button at least 8 times.
Skipping the press. Unpressed seams look amateur and function poorly. Press every seam after sewing.
Building a DIY woobie jacket takes time and attention to detail. The result is a jacket that fits your body and your needs exactly. If you want a finished option without the sewing, Dragoon Unlimited offers ready-made woobie smoking jackets in multiple camouflage patterns. Our jackets use authentic quilted poncho liner material and are built to withstand field use. Whether you build your own or choose a finished jacket, the key is having gear you trust when it matters.

Frequently Asked Questions
What fabric is a woobie made of?
A woobie is traditionally made from nylon or polyester quilted material. Military-issue poncho liners use ripstop nylon or polyester for durability and water resistance. When making a DIY woobie jacket, synthetic insulation like polyester batting works best because it retains warmth when wet, dries quickly, and resists mildew. The outer shell and lining are typically 100% polyester for breathability and lightweight performance in field conditions.
Can you make a woobie jacket without a sewing machine?
Hand-sewing a woobie jacket is possible but labor-intensive and less durable. A basic sewing machine makes the job significantly faster and creates stronger seams that withstand field use. If hand-sewing, use heavy-duty thread, backstitch for strength, and plan for 20-30 hours of work. Machine-sewn seams are more reliable for outdoor gear that needs to handle stress, mud, and repeated washing.
How do you keep a woobie jacket from fraying?
Prevent fraying by finishing all raw edges before assembly. Use a serger or zigzag stitch along cut edges, or apply binding tape to seams. When sewing layers together, nest the raw edges inside the quilted sandwich so they're hidden. After turning the jacket right-side out, topstitch around the perimeter to seal the opening and reinforce all seams. Polyester and nylon naturally resist fraying better than natural fibers, but proper edge finishing ensures long-term durability in the field.
What materials do you need to make a DIY woobie jacket?
You'll need outer shell fabric (ripstop nylon or polyester), lining fabric (polyester), synthetic insulation or batting, thread, a sewing machine, needles, pins, measuring tape, scissors or rotary cutter, and a pattern. Optional items include bias tape for finishing edges, snaps or buttons for closures, and elastic for cuffs. The Dragoon Unlimited Trooper Poncho Liner ($69.99) shows the quality standard you're aiming for in durability and construction.


