


Last Updated: November 1, 2026
Quick Summary
For extreme cold, wear three thin adjustable layers instead of one heavy coat: a base layer that wicks sweat off your skin, a midlayer that traps heat, and a shell that blocks wind and wet. Match each layer to the combined temperature and wind chill, and vent before you sweat so your base layer stays dry.
- Choose a thin synthetic or wool base layer; cotton soaks up sweat and chills you.
- Match midlayer weight to output: go lighter when moving hard, warmer when standing around.
- A windy 20°F day demands more protection than a still one at the same reading.
- Start slightly cold at the trailhead; you will warm up within 10-15 minutes of moving.
- Pack a dry spare base layer in a waterproof bag as emergency insulation.
Table of Contents
- Build a Cold-Weather Layering System That Actually Works
- Pick the Right Base Layer for Cold Weather
- Add Insulation and an Outer Shell for Extreme Cold
- Match Your Layers to Temperature and Wind Chill
- How to Stay Warm While Hiking and Manage Sweat
- Your Winter Hiking Clothing Checklist, Head to Toe
- Fix Fit and Layering Order Before You Head Out
- Gear Up for Your Next Cold-Weather Trip
- Frequently Asked Questions
Build a Cold-Weather Layering System That Actually Works
Cold-weather layering is the practice of wearing three thin, adjustable layers instead of one heavy coat, so you can trap heat and dump sweat as conditions change. At Dragoon Unlimited, we build gear around that idea because it works when the temperature drops and the wind picks up. The core system has three parts: a base layer that moves sweat off your skin, a midlayer that holds heat, and a shell that blocks wind and wet. Get those three right and you stay warm without overheating.
The National Weather Service wind chill chart shows why this matters. Wind strips heat from exposed skin fast, and a single heavy layer can't react when your body heat climbs on a climb. Layers can.
Below, we break down each layer, show you how to match them to real temperatures, and give you a head-to-toe checklist you can pack tonight.
Pick the Right Base Layer for Cold Weather
The best base layer for cold weather is a thin, snug-fitting synthetic or wool shirt that wicks sweat away from your skin.
Moisture management is the whole job here. A good base layer moves sweat to the next layer, where it can evaporate.
Choose your weight by activity:
- Lightweight: high-output hikes, mild cold, fast movers
- Midweight: most winter hiking and camping
- Heavyweight: low-output trips, sitting in a blind, extreme cold
Fabric matters too. Wool stays warm when damp and resists odor. Synthetic fabric dries faster. Both are better choices than cotton for cold-weather activity.
Add Insulation and an Outer Shell for Extreme Cold
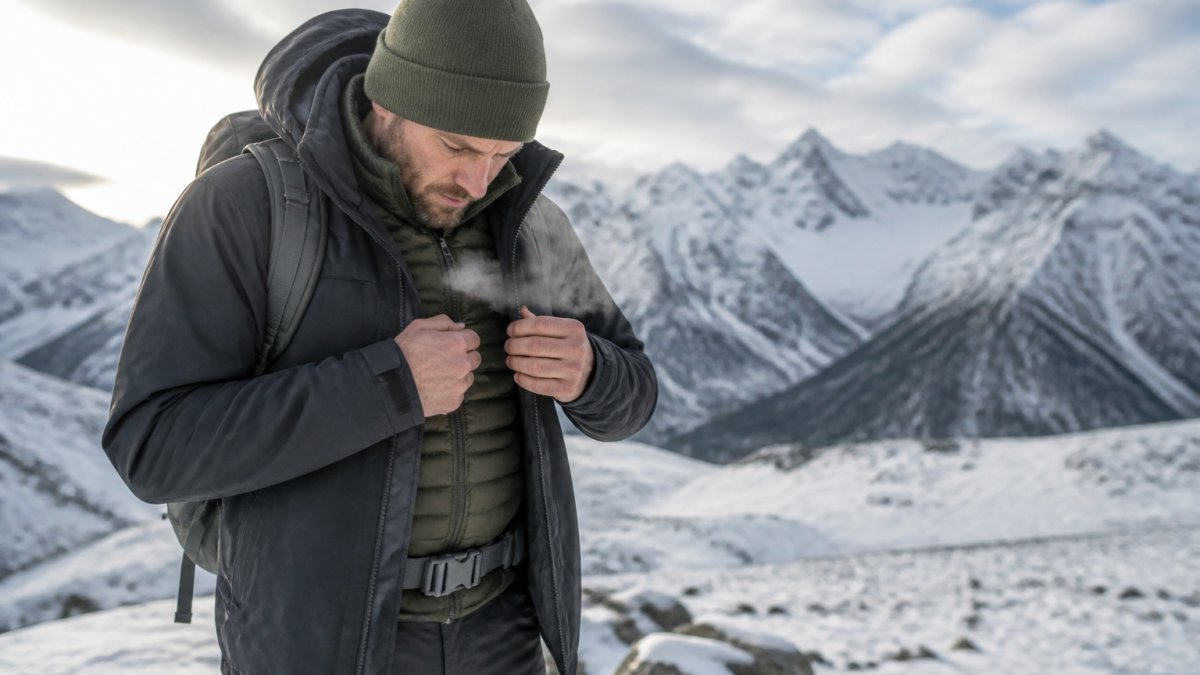
For extreme cold, add a midlayer that traps heat and an outer shell that blocks wind and snow. The midlayer is your insulating layer; the shell is your protective layer.
A poncho liner can work as a lightweight midlayer or camp wrap. Our Improved Poncho Liners use a water-resistant polyester shell that sheds wind, moisture, and dirt, and the three-sided zipper converts one into a lightweight sleeping bag. If you want to understand how warm a woobie really keeps you, read our guide on how warm a woobie will keep you. And if you're still deciding whether a liner belongs in your pack, here's why a woobie works for cold-weather camping.
Midlayer Weight and Heat Retention
Match midlayer weight to output. Fleece breathes well and dries fast, which suits active hiking. Down insulation packs small and traps heat best when you're standing still, but it loses warmth when wet. Synthetic puffy jackets split the difference: warm, water-resistant, and forgiving.
The rule is simple. Moving hard? Go lighter. Standing around? Go warmer.
Shell Jackets: Windproof and Waterproof Protection
A shell jacket is your barrier against wind, snow, and rain. Windproof matters more than most people think; wind is what turns a cold day dangerous. Look for a waterproof or water-resistant shell with venting you can open when you heat up.
Still weighing a poncho against a jacket? Our comparison of poncho vs rain jacket for backpacking covers the trade-offs.
Match Your Layers to Temperature and Wind Chill
Match layers to the combined effect of temperature and wind chill, not the thermometer alone. Wind strips heat from exposed skin, so a windy 20°F day demands more protection than a still one at the same reading (Understanding Wind Chill). The National Weather Service wind chill chart is the reference most forecasters and outdoor programs use; check it before you pack, because a 15°F forecast with 25 mph wind behaves like a much colder still day.
Use this chart as your starting point. It assumes a moderately active pace with stops; adjust up or down for your output and your own cold tolerance.
| Temperature (still air) | Wind chill equivalent at 20-25 mph | Base Layer | Midlayer | Shell | Extremities |
|---|---|---|---|---|---|
| 40°F and up, active | 32-36°F | Lightweight synthetic or wool | None or thin fleece | Light wind shell | Liner gloves, thin hat |
| 25-40°F | 10-20°F | Lightweight to midweight | Fleece | Windproof shell | Insulated gloves, warm hat |
| 10-25°F | -5 to 10°F | Midweight | Fleece plus light puffy | Insulated or hard shell | Mittens, balaclava, wool socks |
| Below 10°F or high wind | Below -10°F | Heavyweight | Puffy midlayer | Hard shell plus face protection | Mittens over liners, goggles, full face coverage |
Three modifiers override the chart:
- Activity level: If you are hiking hard uphill, dress for one row warmer than the chart says and vent aggressively. If you are sitting in a blind, snow-camping, or doing camp chores, dress for one row colder and add a puffy you can throw on the moment you stop.
- Stop-start days: On trips with frequent breaks, carry an extra puffy layer that lives in your pack and goes on at every stop. The chart assumes you keep moving; breaks are when chill sets in fastest.
- Wet conditions: Snow, sleet, and rain raise the effective cold. A wet shell loses insulation value, so favor a waterproof shell and a synthetic midlayer over down when precipitation is likely.
Treat the chart as a starting point, not a rule. Your body, your pace, and your activity level decide the rest. Check the forecast the morning you leave, note the wind speed, and pick the row that matches the wind chill rather than the raw temperature.
“Trooper” MultiCam/OCP 3-Side Zippered Poncho Liner with Headport & Stuff Pad →
How to Stay Warm While Hiking and Manage Sweat
Staying warm while hiking comes down to one skill: managing sweat. Sweat is the enemy of warmth. If you soak your base layer on the climb, you will freeze at the summit, and in extreme cold a damp base layer can pull heat from your core faster than the air temperature alone would suggest.
The strategy has three phases: before you sweat, while you move, and when you stop.
Before you sweat (start of day and start of climbs):
- Start slightly cold. You will warm up within 10-15 minutes of moving. If you are comfortable standing at the trailhead, you are overdressed.
- Open every vent, pit zips, chest zips, and the front zipper, before the climb, not after you feel damp.
- Take off your hat and gloves before your core overheats; the head and hands are your fastest heat dump.
While you move (high-output hiking):
- Remove your midlayer before you sweat through it. A common pattern is to hike in base layer plus shell on steep climbs and add the midlayer back at the top.
- Use a buff or neck gaiter you can pull down instead of a full balaclava on climbs, so you can dump heat without stopping.
- Check your base layer at each break. If it feels damp against your skin, you waited too long to vent.
When you stop (breaks, camp, and emergencies):
- Add your puffy layer the moment you stop, before you cool down. Do not wait until you feel cold.
- Swap a damp base layer for a dry one at camp. This is the single most effective warmth intervention in extreme cold, and it is why a dry spare base layer belongs in every pack.
- Dry damp layers against your body inside your sleeping bag overnight, or in a mesh pocket near your core while you move the next day. Do not leave wet clothing in a stuff sack.
Breathability matters under a shell. If you are hiking in humid or wet conditions, read our guide to breathable rain gear for humid hiking so you do not soak your layers from the inside. A shell that traps your own sweat is worse than no shell on a climb, because it turns your base layer into a wet suit.
Your Winter Hiking Clothing Checklist, Head to Toe
A complete winter hiking clothing checklist covers every inch of skin, because heat escapes everywhere. Pack these:
- Base layer: synthetic or wool top and bottom
- Midlayer: fleece or light puffy
- Shell: windproof and waterproof jacket
That last item is not optional. A dry layer in your pack is the difference between a cold night and a safe one.
Fix Fit and Layering Order Before You Head Out
Fit and layering order decide whether your system works. Wear layers in this order: base, then midlayer, then shell.
Avoid compression. If a layer squeezes your arms or shoulders, it flattens the insulation and cuts mobility.
Check your range of motion before you leave. Reach overhead, swing your arms, squat down. If anything binds, size up or drop a layer.
Gear Up for Your Next Cold-Weather Trip
Building a cold-weather layering system is not complicated. It just takes the right three layers, matched to the conditions, plus the discipline to adjust them as you move.
At Dragoon Unlimited, we build gear for exactly this. Our poncho liners have a water-resistant polyester shell and a three-sided zipper, and a portion of each purchase goes to veteran organizations.
Get started with Dragoon Unlimited and gear up for your next cold-weather trip with layers you can trust.
Frequently Asked Questions
What are the three layers for extreme cold weather?
The three-layer system starts with a base layer that moves sweat off your skin, adds a midlayer that traps heat, and finishes with an outer shell that blocks wind and precipitation. In extreme cold you may wear two midlayers, such as a fleece under a down or synthetic jacket. Each layer does one job, so you can add or remove pieces as your activity level and the temperature change. Getting the order right matters more than buying the most expensive gear.
Is wool or synthetic better for a base layer for cold weather?
Both work, but they behave differently. Wool stays warm when damp and resists odor over multi-day trips, which suits winter camping and backpacking. Synthetics dry faster and cost less, which helps when you sweat hard on a hike and need the layer to dry overnight. Avoid cotton entirely in extreme cold because it holds moisture against your skin. Many cold-weather hikers pair a synthetic base layer for high-output days with wool for camp.
How many layers should you wear in extreme cold?
Most people do well with three to four layers: a base layer, one or two midlayers, and a shell. The right number depends on temperature, wind chill, and how hard you are working. Start with fewer layers and add as you cool down. If you are sweating within the first ten minutes, you left the trailhead overdressed. Carry your spare midlayer in your pack and put it on the moment you stop moving.
How do you avoid sweating while dressing for extreme cold?
Dress for the pace, not the parking lot. Start slightly cool and let your body heat build as you move. Unzip your shell and pit zips on climbs, then close them before descents and rest stops. Manage sweat with a wicking base layer, and change out of a damp base layer as soon as you reach camp. A poncho liner like the Dragoon Unlimited Improved Poncho Liner, $69.99, packs small and is available with a stuff sack.
Cold weather punishes gear that cuts corners. If you want a midlayer that packs small, sheds wind and moisture, and doubles as a sleep system, our poncho liners are built for it. Browse the Improved Poncho Liners and see which camo pattern fits your kit. Sign up for our newsletter for 10% off your first order.


