


Last Updated: November 1, 2026
Quick Summary
A lightweight rain gear layering system pairs a moisture-moving base layer, a ventable insulating mid layer, and a waterproof breathable shell so you stay dry from rain and sweat alike. Most hikers who get cold and wet were let down by what they wore under the shell, not the shell itself. Assign each of the three jobs to a separate piece and you can handle spring-to-fall conditions with a very light pack.
- Cotton holds water against your skin and loses all insulating value when wet, so leave it at home.
- Start the climb in your base layer plus shell with the mid layer stowed, and add fleece before you feel cold.
- Ultralight emergency shells run roughly 5-8 oz, while lightweight 3-layer shells run roughly 10-14 oz.
- Prioritize pit zips over breathability ratings, since mechanical ventilation moves more moisture in ten minutes.
- A dry base layer at camp is worth more than any extra insulation.
Table of Contents
- How a Lightweight Rain Gear Layering System Works
- What to Wear Under a Rain Jacket: Base and Mid Layers That Work
- The Three-Layer Clothing System for Hiking in Wet Weather
- Rain Poncho vs Rain Jacket for Hiking: Which Layer Belongs in Your Pack
- Choosing a Breathable Waterproof Shell for Hiking
- Managing Sweat and Condensation Under a Waterproof Shell
- Condition-Based Layering Examples for Real Trips
- Build Your Layering Kit at Dragoon Unlimited
- Frequently Asked Questions
How a Lightweight Rain Gear Layering System Works
A lightweight rain gear layering system is a three-part strategy: a moisture-moving base layer, a ventable insulating mid layer, and a waterproof breathable shell, so you stay dry from rain and sweat alike.
This matters more than any single jacket. Most hikers who get cold and wet in the rain were not let down by their shell, they were let down by what they wore underneath it.
The Three Jobs Every Layer Has to Do
- Base layer: move sweat off your skin so you stay dry from the inside.
- Mid layer: trap warmth you can dump fast when the climb starts.
- Outer layer: block rain and wind while letting vapor escape.
Assign those three jobs to three separate pieces and you can handle spring-to-fall conditions with a very light pack. Combine them into one garment and you will overheat on the uphill and freeze on the ridge.
Watch out: the most common failure is wearing a waterproof shell as your only layer over a cotton t-shirt. The shell blocks rain, and the cotton soaks up sweat.
What to Wear Under a Rain Jacket: Base and Mid Layers That Work
What you wear under a rain jacket decides whether the shell performs or turns into a sauna. Choose a thin synthetic or merino base layer that wicks moisture, and an open-structured mid layer like grid fleece or lightweight pile that lets vapor pass through instead of trapping it against your skin.
Base Layer: Move Sweat, Not Cotton
Cotton is the one material to leave at home. It holds water against your skin, loses all insulating value when wet, and takes hours to dry in humid conditions.
Fit matters as much as fabric. A base layer should sit close to the skin without binding at the shoulders; loose fabric creates air pockets that trap sweat instead of transferring it.
Mid Layer: Insulation You Can Vent
Fleece, grid fleece, and lightweight pile are the workhorses here. Their open structure lets sweat vapor pass out rather than condensing inside your shell. A full-zip fleece costs a few grams and buys you the ability to dump heat in seconds without stopping to strip layers.
For a deeper look at how these pieces behave in humid, high-sweat conditions, see our guide to breathable rain gear for humid hiking.
The Three-Layer Clothing System for Hiking in Wet Weather
The three-layer clothing system for hiking is a common backcountry approach: base layer against the skin, insulating mid layer over it, and a weather-resistant shell outside.
Here is one way to run it on a wet day:
- Start the climb in your base layer plus shell, mid layer stowed.
- Add the fleece at the first rest stop before you feel cold, not after.
- Vent the shell's pit zips on steep sections instead of removing it.
- Add a dry hat and gloves at the summit, where wind strips heat fastest.
- Swap to a dry base layer at camp. A dry base layer is worth more than any extra insulation.
A well-chosen system can weigh less than a single heavy jacket, and packability matters: a shell that stuffs into its own pocket leaves room for water, food, and shelter.
Rain Poncho vs Rain Jacket for Hiking: Which Layer Belongs in Your Pack
A rain jacket suits high-output hiking because it seals at the wrists, hood, and hem while venting through pit zips. A poncho suits camp, emergency use, and ultralight loads because it covers your pack and ventilates freely at the sides.
The trade-offs are real. A jacket's sealed seams and adjustable hood protect your head and arms in wind-driven rain but trap heat on a climb.
When a Poncho Liner Beats a Shell
A poncho liner beats a shell when you need warmth and wind resistance in a package that doubles as a sleep layer. The “Trooper” MultiCam/OCP 3-Side Zippered Poncho Liner with Headport & Stuff Pad is one option for that role: a three-sided zipper converts it into a lightweight sleeping bag or bivy-style cover, the zippered head port lets it work as a poncho insert or serape wrap, and the weather-resistant polyester shell sheds wind, moisture, and dirt.

For a full head-to-head breakdown before you commit, read our comparison of poncho vs rain jacket for backpacking.
“Trooper” MultiCam/OCP 3-Side Zippered Poncho Liner with Headport & Stuff Pad →
Choosing a Breathable Waterproof Shell for Hiking
A breathable waterproof shell for hiking blocks rain while letting sweat vapor escape. The features that matter most are pit zips, an adjustable hood, taped seams, and a fabric that balances weather protection with air permeability. Everything else is preference, but preferences are where most buyers get lost, so here is how to choose between shell types instead of comparing spec sheets.
Match the Shell Type to Your Conditions
Lightweight rain shells fall into three rough families, and each one trades protection, durability, weight, and packed volume differently.
- Ultralight emergency shells (roughly 5-8 oz): Coated or 2.5-layer fabrics, minimal features, pack to the size of a fist. Best for fast day hikes, intermittent showers, and trips where rain is a possibility rather than a certainty. They wet out faster under sustained rain and are less abrasion-resistant against pack straps and brush.
- Lightweight 3-layer shells (roughly 10-14 oz): A separate inner liner bonded to the membrane, which protects the waterproof layer from your sweat and oils. These hold up to sustained rain and multi-day use, vent better with pit zips, and are the default for three-season hiking. The cost is weight and packed volume.
- Burly all-season shells (roughly 15 oz and up): Thicker face fabrics, reinforced shoulders, helmet-compatible hoods. Worth it for winter, alpine, and heavy brush; overkill for warm-weather hiking where you will sweat more than the shell can pass.
A common pattern: hikers buy the burliest shell they can afford, then overheat in it on every climb. If most of your rain falls in warm months, a lighter 3-layer shell with good pit zips will keep you drier than a heavier jacket you have to take off.
The Features That Actually Change Performance
- Pit zips: Mechanical ventilation moves more moisture in ten minutes than a fabric upgrade does all day. Prioritize them over breathability ratings.
- Hood: You want one you can cinch one-handed and that clears a cap or helmet without blocking peripheral vision. A hood that collapses into the collar is a nice bonus on light shells.
- Cuffs and hem: Cuffs that seal over gloves and a hem that stays put under a pack belt are what keep wind-driven rain from running up your sleeves and back.
Packability and Weight Trade-Offs
Treat weight and packed volume as separate specs. A shell can be light but bulky, or heavier but compressible. When space is the constraint (bear canister trips, winter loads), packed volume matters more than grams; for fast-and-light trips, grams matter more. Shaving 4 oz off a shell rarely matters if your shelter and sleep system are heavy, but it matters a lot when everything else is dialed.
If you are selecting gear for multi-day routes, our notes on choosing rain gear for long-distance trekking cover what holds up over weeks rather than weekends.
Managing Sweat and Condensation Under a Waterproof Shell
Condensation under a waterproof shell is normal and manageable: your body produces moisture faster than any fabric can pass it, so the goal is controlling where that moisture ends up.
- Open pit zips and the front zip on every climb, then close them on descents and ridges.
- Start cold. If you are warm before you start moving, you will be soaked in twenty minutes.
- Wear the thinnest base layer that keeps you comfortable, and keep a dry spare in a waterproof stuff sack.
A common mistake is layering a waterproof shell directly over a heavy insulated jacket. The insulation traps vapor, the shell traps it in turn, and the inside of your jacket gets wet.
Condition-Based Layering Examples for Real Trips
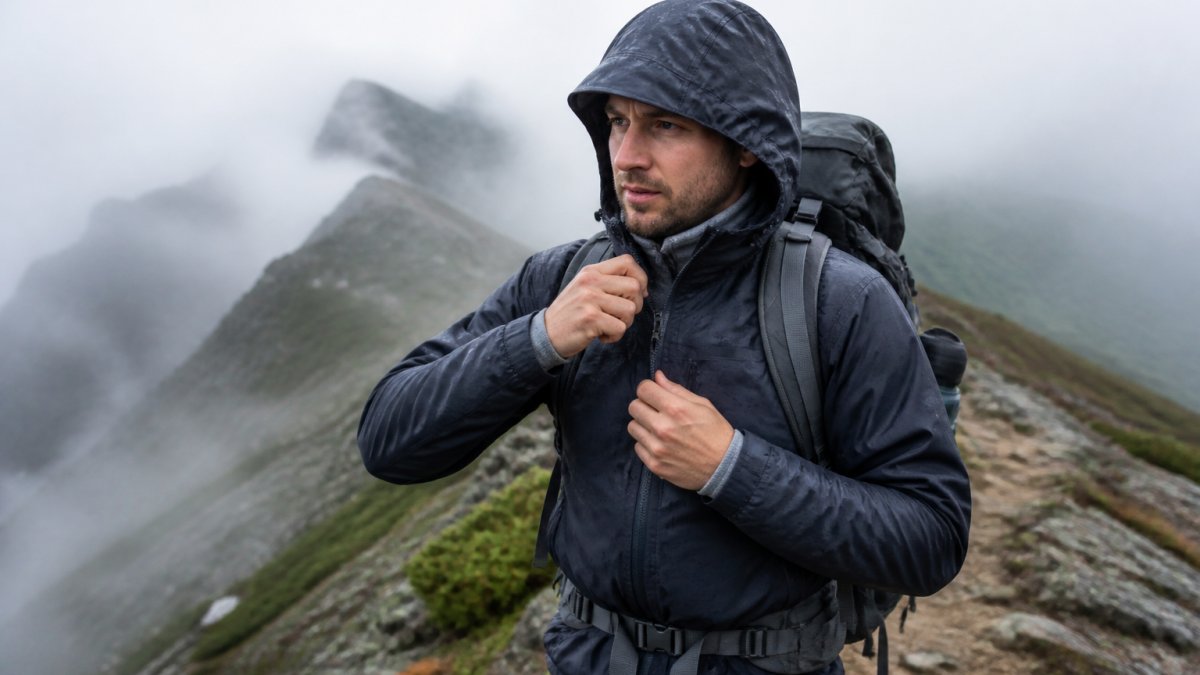
The right combination changes with the weather. Here are sample systems built around temperature, precipitation, wind, and exertion, starting points to adjust for how you run hot or cold.
Warm Rain (60s F, Humid, Steady Precipitation)
- Base: Thin synthetic tee or lightweight merino crew.
- Mid: None while moving; pack a light grid fleece for stops.
- Shell: Ventable lightweight shell with pit zips.
Cold Rain (40s F, Windy, Intermittent Showers)
- Base: Merino or midweight synthetic long sleeve.
- Mid: Grid fleece or lightweight pile, full-zip so you can dump heat fast.
- Shell: 3-layer shell with a cinchable hood.
Snow and Sleet (30s F, Wind-Driven)
- Base: Midweight synthetic or merino.
- Mid: Fleece while moving; add a poncho liner or synthetic vest at camp.
- Shell: 3-layer shell with a hood that clears a beanie.
High-Output Climb in Light Rain (50s F, Intermittent Drizzle)
- Base: Thin synthetic tee.
- Mid: None.
- Shell: Ultralight emergency shell, pit zips open.
Static Camp in Rain (40s F, Wet, Low Exertion)
- Base: Dry synthetic or merino base layer reserved for camp.
- Mid: Fleece plus poncho liner or synthetic jacket.
- Shell: Shell over the mid layer, or a poncho for full coverage while sitting.
Fast Day Hike in Intermittent Showers (50s-60s F)
- Base: Thin synthetic tee.
- Mid: None; fleece stays in the pack until you stop.
- Shell: Ultralight shell with pit zips.
On a wet spring overnight, carry the shell plus a poncho liner for rain protection while moving and insulation while static. On a multi-day trip with mixed conditions, pack the 3-layer shell and one mid layer rather than two shells, versatility beats redundancy.
Here are the sample systems the article builds around temperature, precipitation, wind, and exertion.
| Condition | Base | Mid | Shell |
|---|---|---|---|
| Warm rain (60s F, humid, steady) | Thin synthetic tee or lightweight merino crew | None while moving; light grid fleece for stops | Ventable lightweight shell with pit zips |
| Cold rain (40s F, windy, intermittent) | Merino or midweight synthetic long sleeve | Grid fleece or lightweight pile, full-zip | 3-layer shell with a cinchable hood |
| Snow and sleet (30s F, wind-driven) | Midweight synthetic or merino | Fleece while moving; poncho liner or vest at camp | 3-layer shell with hood that clears a beanie |
| High-output climb in light rain (50s F) | Thin synthetic tee | None | Ultralight emergency shell, pit zips open |
| Static camp in rain (40s F, wet) | Dry synthetic or merino base reserved for camp | Fleece plus poncho liner or synthetic jacket | Shell over the mid layer, or a poncho |
| Fast day hike in intermittent showers (50s-60s F) | Thin synthetic tee | None; fleece stays in the pack until you stop | Ultralight shell with pit zips |
Build Your Layering Kit at Dragoon Unlimited
Building a layering kit is mostly about buying three pieces that work together instead of one piece that tries to do everything. We design and test our gear for that approach.
The Improved Poncho Liners come in several camo patterns, including the “Reforger” Woodland at $64.99 and the “Fire Force” Rhodesian Brushstroke at $69.99, each with a three-sided zipper, zippered headport, stuff sack, and head pad. For shelter, the Ridgeback one-person bugout bivy is listed with UV-resistant ripstop fabric, taped seams, and a bathtub-style waterproof floor at $135.00.

Frequently Asked Questions
What is the best layering system for hiking in the rain?
A three-part rain gear layering system: a moisture-wicking base layer against your skin, a light insulating mid layer you can vent, and a waterproof breathable shell on top. The base moves sweat away, the mid traps warmth, and the shell blocks rain and wind. Add or remove the mid layer as your output changes so you do not soak the insulation from the inside. This setup handles spring-to-fall hiking in wet conditions without the bulk of a heavy coat.
What layers should you wear under a lightweight rain jacket?
Start with a synthetic or wool base layer, never cotton, because cotton holds moisture against your skin. Add a fleece or light pile mid layer for warmth in cold conditions, and skip the mid layer when it is mild. The rain jacket goes on last as your weather barrier. If you expect steady rain and cool temps, a poncho liner worn under the shell adds warmth without much weight, and it packs down small in a stuff sack.
Is a rain jacket or poncho better for layering?
A rain jacket wins for high-output activity like climbing or fast hiking because it seals at the wrists and waist and vents sweat better. A poncho gives more airflow and covers your pack, which suits camp, hunting blinds, and slow walks. Many hikers carry both: a breathable waterproof shell for the trail and a poncho liner or poncho for rest stops. The right pick depends on how hard you will be working and how much rain you expect.
How breathable should a lightweight rain shell be?
Breathability matters most when you are moving hard in rain. Look for a shell with pit zips or mesh-backed pockets so you can dump heat fast, plus a fabric that lets moisture vapor escape. No shell breathes perfectly in steady rain, so ventilation features do real work. Pair a breathable shell with a moisture-wicking base layer and you will manage sweat far better than with a fully sealed, unvented jacket.
How do you keep rain gear lightweight without sacrificing protection?
Choose one shell that handles wind and rain instead of separate pieces, use a packable poncho liner for warmth instead of a bulky insulated jacket, and pick layers you can wear together or alone. A three-layer clothing system for hiking built this way covers cold, wet, and windy conditions with fewer items. Weigh each piece before you pack it and leave the extras at home. Packability and weight trade-offs are worth checking on every layer.
The hardest part of any wet-weather trip is trusting your gear when the forecast turns. We build for that moment: field-tested construction, designs shaped by customer feedback, and a portion of every sale going to veteran organizations. Get started with Dragoon Unlimited and carry a layering system you never have to think twice about.


