


Quick Summary
Bushcraft survival skills are the practical abilities that keep you safe, warm, hydrated and fed outdoors without outside support, centred on fire, shelter, water, navigation, first aid and a calm head. Nothing on the list is exotic; what separates a good outcome from a bad one is practice before you need it.
- Fire needs fuel, oxygen and heat, and most failed fires die from insufficient heat rather than lack of fuel.
- Stage tinder, kindling and fuel in that order and add larger wood only after coals form.
- Choose shelter sites away from dead branches overhead, dry low spots and water runoff paths.
- Boil water at a rolling boil and hold it there for at least one minute to purify it.
- Schedule practice sessions to light a fire with a ferro rod and pitch a shelter before relying on them.
Table of Contents
- What Bushcraft Survival Skills Cover and Why They Matter
- Mental Preparedness and Staying Calm Under Stress
- Fire-Making and Firecraft Fundamentals
- How to Build a Survival Shelter in the Field
- Water Sourcing, Purification and Foraging Basics
- Bushcraft Gear Essentials and Emergency Preparedness Kits
- Putting Your Bushcraft Skills to Work This Season
- Frequently Asked Questions
What Bushcraft Survival Skills Cover and Why They Matter
Last Updated: October 27, 2026
Bushcraft survival skills are the practical abilities that let you stay safe, warm, hydrated and fed outside without a support system. The same handful of skills often comes up: fire, shelter, water, navigation, first aid and a steady head.
The discipline matters because small problems compound outdoors. A cold night can make decisions harder. National Park Service backcountry safety guidance recommends carrying the means to build a fire, signal for help and shelter from weather, precisely because these three gaps turn a manageable setback into a rescue.
Bushcraft is not the same as survival camping or prepping, though the skills overlap. Bushcraft focuses on working with natural materials to meet everyday needs, from plant-fiber cordage to a shelter built from fallen branches.
Mental Preparedness and Staying Calm Under Stress
The first tool in any emergency is your head. Panic narrows attention, speeds up breathing and makes simple tasks feel impossible. Most people who get into serious trouble outdoors were not short on gear.
A practical habit is to stop, breathe slowly for a few cycles and list three things: where you are, what you have and what you need in the next hour. That routine forces the brain back into problem-solving mode, a quick after-action review applied to your own situation.
Set priorities in order. Shelter and warmth come before food. Water matters within a day, but food can wait far longer. Small, completed tasks help too.
Fire-Making and Firecraft Fundamentals
Fire is the most useful skill in the bush. It provides warmth, boils water, cooks food, dries clothing and gives you a signal. Learning to build one reliably in wet or windy conditions is the real test, and the difference between a fire that catches and one that smolders comes down to a few measurable factors.
Understand the fire triangle before you strike a spark
Combustion needs three things: fuel, oxygen and heat. Most failed fires are heat failures, not fuel failures. A ferro rod throws sparks, but that heat lasts a fraction of a second. The spark must land on tinder fine enough to catch from that brief exposure, if your tinder is damp or too coarse, the spark dies before ignition.
Build your tinder bundle in three grades
Think of fire material in three sizes, and stage all three before you strike:
- Tinder: the finest material that catches a spark or ember. Dry grass, birch bark, cattail fluff, shredded inner bark, or charred cloth. A bundle roughly the size of a softball is a practical target.
- Kindling: pencil-thick to finger-thick dry twigs, split if possible so the dry interior is exposed.
- Fuel: wrist-thick and larger wood, added only after a bed of coals forms.
Many failed fires die because the builder adds larger wood before the first flame has caught. Feed the fire in the order it needs, not the order you stacked it.
Match the fire lay to the conditions
A few standard lays cover most situations:
- Teepee lay: kindling leaned into a cone over the tinder. Good for a quick flame and for damp conditions because the cone draws air up through the center.
- Lean-to lay: a larger stick driven into the ground at an angle with kindling leaned against it. Useful when wind is steady from one direction.
- Log cabin lay: kindling stacked in a square crib. Burns longer and gives you a stable bed of coals for cooking.
Ignition tools and their trade-offs
Ignition sources have different trade-offs:
- Ferro rod: throws sparks at very high temperature, works when wet, and lasts for thousands of strikes. It requires dry, fine tinder and practice to strike one-handed.
- Butane lighter: fast and easy, but the fuel and the mechanism can fail in cold, and a wet lighter may not light until it dries.
- Stormproof matches: reliable in wind and rain, but limited in number and easy to waste.
Practice striking your ferro rod onto dry tinder at home.
Wet-weather firecraft
Gather dead branches still attached to the tree rather than from the ground, since standing dead wood sheds water. Split larger pieces to reach the dry core. Keep a small stash of dry tinder in a waterproof container. Build the fire small and sheltered, and shield it with your body or a rock while it catches.
Put it out cold
Burning a fire down to coals is the safer habit for leaving camp. Before you leave, drown the coals, stir the ashes, and feel the bed with the back of your hand, if it is warm, it is not out. Check local rules before lighting any fire.
The table below summarises the three tinder grades and the main ignition tools covered in the fire section, so you can check what each one is for at a glance.
| Item | Size or type | Key note |
|---|---|---|
| Tinder | Softball-sized bundle | Finest material; catches a spark or ember |
| Kindling | Pencil- to finger-thick twigs | Split to expose the dry interior |
| Fuel | Wrist-thick and larger wood | Add only after coals form |
| Ferro rod | Sparks at very high temperature | Works when wet; needs dry, fine tinder |
| Butane lighter | Fast ignition | Can fail in cold; wet lighter may not light |
| Stormproof matches | Reliable in wind and rain | Limited in number |
How to Build a Survival Shelter in the Field
Shelter can protect you from wind, rain, cold and heat. Your body loses heat through conduction into cold ground, convection into moving air, evaporation from wet clothing and radiation into open sky.
Choose the site before you choose the design
Look for level ground away from dead branches overhead, dry low spots and the path of water runoff, and use natural features like a fallen log or dense trees as a windbreak. Avoid valley bottoms where cold air pools overnight and ridgelines where wind is strongest. A slightly sheltered, slightly sloped site is an option to consider.
Pick the shelter type that matches your kit
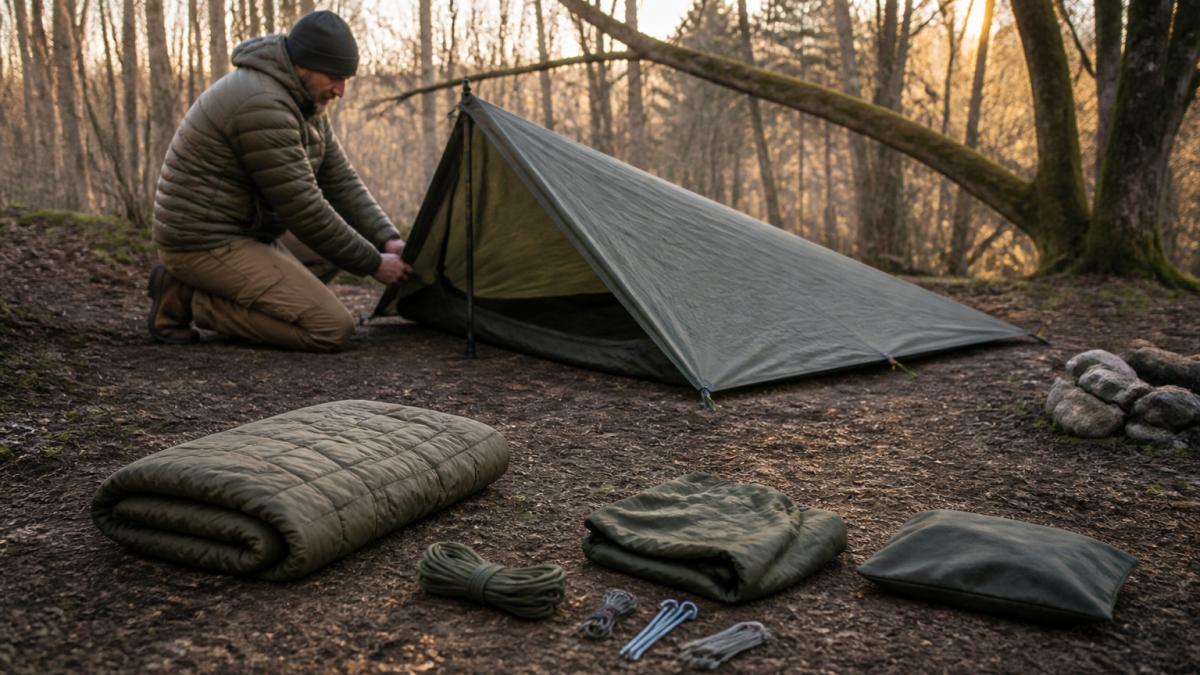
- Tarp lean-to: the fastest option with a poncho or tarp. Rig a ridgeline between two trees or trekking poles, pitch one side to the ground, and face the opening away from the wind. A low profile sheds rain and holds warmth.
- A-frame tarp: a ridgeline with both sides staked down. More enclosed than a lean-to and better in rain, but it traps condensation, so leave a vent gap at one end.
- Debris hut: the classic bushcraft shelter for when you have no tarp. A ridgepole supported at one end, ribs leaned against it, and a thick layer of leaves, pine boughs or duff piled over the top. The insulation layer should be deep, a common rule of thumb is at least 18 inches of dry debris over the frame, because loose debris compacts and loses loft.
- Bivy or tent: the most weatherproof option when you carry it. A bathtub-style floor and taped seams keep ground moisture out, which matters more than most people expect.
Build in the right order
Step 1: Set your frame. Use a ridgeline, a sturdy branch or trekking poles to hold your covering up.
Step 2: Add the covering. Pitch your tarp or poncho so rain runs off the outside edge.
Dragoon Unlimited Ridgeback One Person Camping, Hunting Tent, Bugout Bivy →
Step 3: Insulate the floor. Pile dry leaves, pine boughs or a folded pad beneath your sleeping area, keeping the insulation off any damp ground.
Step 4: Seal the openings. Close the windward side and leave a small gap for ventilation to prevent condensation build-up.
The legal and ethical side of shelter building
Before you build, check the rules for the specific land you are on.
Leave No Trace principles apply directly to shelter building: use dead and downed material only, dismantle your shelter when you leave, and disperse the material back across the site.
The Ridgeback One Person Camping, Hunting Tent, Bugout Bivy & Survival Shelter is a one-person shelter option to consider.
Water Sourcing, Purification and Foraging Basics
Water is an important consideration alongside shelter and warmth. Look for a water source and collect from it rather than the shoreline mud.
Boiling is the most dependable purification method when you have a fire. Bring water to a rolling boil and hold it there for at least one minute. CDC guidance on water treatment in emergencies describes boiling and disinfection as the reliable baseline when water quality is uncertain.
Foraging can supplement your supplies, but it demands caution. Learn about plants in your region before you need them.
Bushcraft Gear Essentials and Emergency Preparedness Kits
A basic bushcraft kit can include a knife, a fire starter, a signal device, cordage, a tarp or poncho, a water container, a first aid kit and navigation tools such as a map and compass.
Emergency preparedness kits extend that core into a complete system. A common approach is a 72-hour kit covering water, food, medications, light, communication and warmth. Ready.gov emergency kit recommendations offers a widely used starting checklist you can adapt to your environment.
Check your kit for worn cordage, rusted fasteners, dried-out tinder and expired medications. Dry and clean fabric before storing it, and rotate food and water before they expire.
The Woodland Camo Poncho Liner from Dragoon Unlimited is a poncho liner option.
Putting Your Bushcraft Skills to Work This Season
Schedule a practice session: light a fire with a ferro rod, pitch a shelter and learn about water treatment. These drills let you practice the skills.
Start small and build up: spend one weekend on fire and one on shelter, then combine them on a longer outing.
The core lesson is that bushcraft survival skills involve practice. Pick one skill from this guide and practice it.
Frequently Asked Questions
What are the 5 basic bushcraft skills?
Five useful areas to learn are fire-making, shelter building, water sourcing and purification, wilderness navigation, and basic first aid. You can practice them on short day trips.
How do I start learning bushcraft survival skills?
Start with one skill at a time and practice it close to home. A first project could be building a simple tarp shelter and lighting a fire with a ferro rod using dry tinder. Keep a notebook of what worked and what failed. You can also take short overnight trips with gear you would carry in an emergency.
What is the difference between bushcraft and survivalism?
Bushcraft can involve using natural resources and simple tools outdoors. Survivalism can involve preparing for emergencies. The two can overlap in skills such as fire, shelter, water and navigation.
What gear do I need to practice bushcraft?
A starter setup can include a fixed-blade bushcraft knife, a ferro rod and tinder, a tarp or one-person shelter, a poncho liner, a map and compass, a water filter or purification tablets, and a basic first aid kit. The Ridgeback One Person Camping, Hunting Tent, Bugout Bivy and Survival Shelter is a one-person tent option. The Trooper MultiCam/OCP Poncho Liner with headport and stuff pad is a poncho liner option. Build your kit gradually.
Are bushcraft skills useful for emergency preparedness?
Bushcraft skills can include learning about warmth, shelter, water and signaling. You can review your emergency preparedness kit and consider whether it includes items for those needs.
How do you build a survival shelter in the woods?
Choose a site and consider natural features like fallen logs or rock faces. A lean-to can be made from a ridge pole, supports and debris or a tarp. A ready-made shelter such as the Ridgeback tent is another shelter option.
How much does a basic bushcraft kit cost?
Dragoon Unlimited's Trooper and Reforger poncho liners are priced at $69.99 and $64.99, and the Ridgeback tent in Emerald Green is $130.00. A shelter and one of those poncho liners cost $199.99 or $194.99, before tools and fire-starting gear.


