


Table of Contents
- What You'll Need Before You Start
- Step-by-Step: How to Wash a Woobie Blanket Properly
- Woobie Blanket Drying Tips: Tumble Dry Low vs. Line Dry
- Choosing the Best Laundry Detergent for Polyester Blankets
- Removing Odors from Military Gear: Sanitization vs. Cleaning
- Stain Removal and Repairing Damaged Stitching
- How Often to Wash and Storage Best Practices
- Conclusion
- Frequently Asked Questions
Last Updated: September 14, 2026
What You'll Need Before You Start
Learning how to wash a woobie blanket properly starts with understanding what you're actually cleaning. A woobie is a poncho liner: a quilted blanket with a nylon shell and synthetic insulation, originally issued as a lightweight layer for troops in the field. That construction is durable, but it punishes rough handling in the wash.

At Dragoon Unlimited, we build and test poncho liners for the field, and the care questions we get most often come down to temperature, detergent, and drying. Get those three right and your liner will outlast most of the gear in your closet.
Here's what to gather before you start:
- Mild, bleach-free detergent
- A front-load washer, or a bathtub for hand washing
- A mesh laundry bag or pillowcase for hardware protection
- A drying rack or clothesline
- A soft-bristle brush for spot treatment
Step-by-Step: How to Wash a Woobie Blanket Properly
The short version: wash on a gentle cycle in cold water with mild detergent, then air dry or tumble on low. The full process takes about 45 minutes of active time, plus drying.
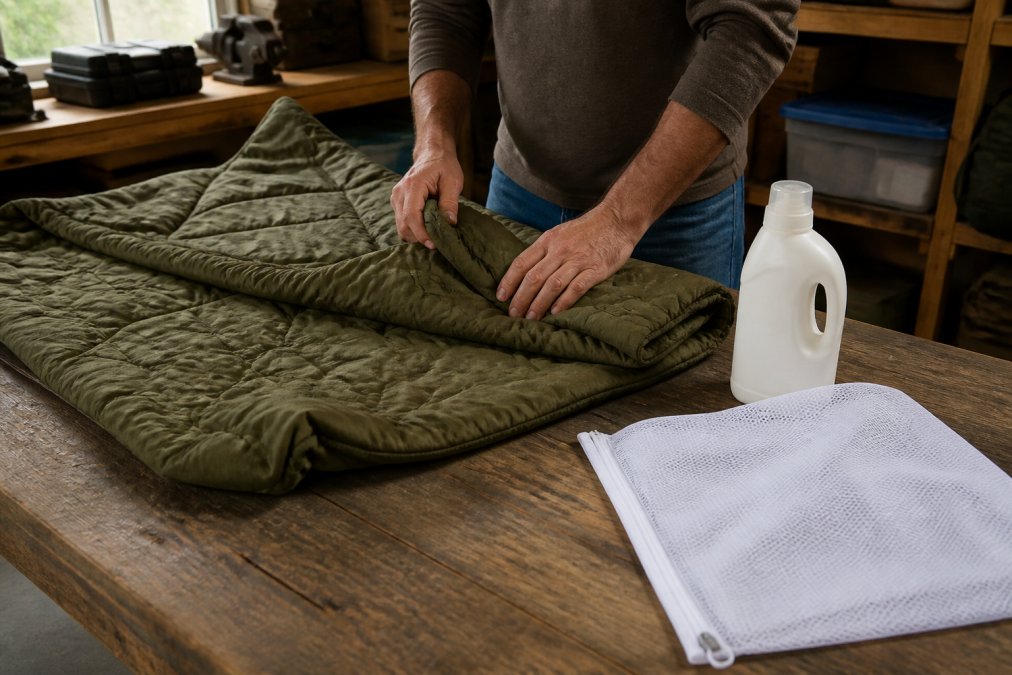
Machine Washing on a Gentle Cycle
- Empty the pockets and close all zippers. Check the head port and stuff sack attachments before the liner goes anywhere near water.
- Place the liner in a mesh bag if it has zippers or hardware that could snag the drum.
- Set the machine to gentle or delicate, cold water, low spin.
- Add mild detergent, roughly half the amount you'd use for a normal load.
- Run the cycle and remove the liner immediately when it finishes.
What most guides miss is the spin cycle. High-speed agitation is what distorts the quilted pattern and stresses stitching over time. A front-load washer is gentler than a top-loader because it tumbles rather than agitates.
Hand Washing for Heavily Soiled Gear
Fill a bathtub with cold water and a capful of mild detergent. Submerge the liner and knead it gently with your hands for five to ten minutes, working the soapy water through the quilted layers. Drain the tub, refill with clean cold water, and repeat until no suds remain. Press the water out by hand, never wring or twist.
Woobie Blanket Drying Tips: Tumble Dry Low vs. Line Dry
The best woobie blanket drying method is line drying in shade, which protects the nylon shell and synthetic insulation from heat damage. Tumble drying on low works when you're short on time, but it carries more risk.
| Method | Heat Level | Time | Best For | Risk |
|---|---|---|---|---|
| Line dry (shade) | None | 4-6 hours | Everyday care | None |
| Air dry (indoor rack) | None | 6-8 hours | Rainy days | Slower |
| Tumble dry low | Low | 20-30 minutes | Quick turnaround | Heat stress on shell |
| Steaming | Low | 5-10 minutes | Wrinkle removal only | Overheating if held too close |
If you tumble dry, use the lowest heat setting and pull the liner out while it's still slightly damp. Hang it to finish. This limits exposure to heat while still speeding things along. A hand steamer handles wrinkles between washes without a full cycle.
Choosing the Best Laundry Detergent for Polyester Blankets
The best laundry detergent for polyester blankets is a mild, bleach-free liquid formula, ideally one labeled for technical or outdoor fabrics. Powder detergents can leave residue in quilted seams, and anything with bleach or brighteners attacks the synthetic insulation.
Avoid these outright:
- Chlorine bleach and oxygen bleach
- Fabric softener and dryer sheets
- Detergents with added perfumes or dyes
A small amount goes a long way. For a single liner, half the standard dose is plenty. If your liner has a durable water repellent finish, check the manufacturer guidance on caring for water-repellent outdoor fabrics before choosing a detergent, since some formulas strip DWR coatings. Maintaining the integrity of these specialized materials requires a consistent approach to washing performance fabrics that preserves both the insulation loft and the protective outer shell.
Removing Odors from Military Gear: Sanitization vs. Cleaning
Most guides treat "washing" and "sanitizing" as the same act. They are not, and conflating them is why so many liners come out of the wash still smelling like a gym bag. Cleaning lifts soil, sweat salts, and body oils off the nylon shell. Sanitizing reduces the bacteria, mildew spores, and yeast that produce odor in the first place. A wash cycle that removes dirt but leaves the insulation damp simply feeds the next bloom of odor.
The Two-Tier Protocol
Tier 1, Routine clean (every 3-6 months): One gentle cold cycle with half the normal dose of mild, bleach-free detergent, followed by complete drying. This handles normal use.
Tier 2, Deep sanitization (after heavy sweat, mildew exposure, or long storage):
- Pre-soak in cold water with white vinegar. Use roughly one cup of distilled white vinegar per gallon of cold water in a bathtub. Submerge the liner fully and let it soak 30 minutes. Vinegar is mildly acidic and disrupts the biofilm odor-causing bacteria build on synthetic fibers; it does not bleach or degrade nylon.
- Wash immediately after the soak on the gentle cycle with mild detergent. Do not let the liner sit in the vinegar bath longer than 30-45 minutes, prolonged acid exposure is unnecessary and offers no added benefit.
- Add a second rinse cycle if your machine allows it. Residual detergent in quilted seams is a common hidden odor source.
- Dry completely, then dry again. This is the step people skip. Synthetic insulation holds moisture in its loft long after the shell feels dry to the touch. Air dry on a rack, then give it another 20-30 minutes of tumble-dry-low or a full afternoon in indirect sun.
Mildew Recovery
If the liner has visible mildew spotting or a musty smell that survives a normal wash, treat it as a sanitization job, not a cleaning job:
- Wash with mild detergent and a dedicated oxygen-based (non-chlorine) sanitizer formulated for technical fabrics, following the product's stated dilution and dwell time.
- Never use chlorine bleach. It attacks the synthetic insulation and yellows the nylon shell.
- Sun exposure is a legitimate sanitizer. Ultraviolet light kills surface mildew spores, but it also fades camo and degrades DWR, so limit direct-sun drying to 1-2 hours and finish in shade.
What Does Not Work
- Dryer sheets and fabric sprays mask odor for a day and leave waxy residue that traps new odor.
- Hot water can set protein-based odor compounds and stress the quilted stitching.
- Sealed plastic storage between uses traps residual moisture and is the single most common cause of recurring mildew smell.
For a quick field refresh between full washes, hang the liner in moving air for a few hours. Air circulation alone removes a surprising amount of surface odor without any water at all.
Stain Removal and Repairing Damaged Stitching
This is where most woobie guides stop at "use a damp cloth." Field gear picks up specific stains that need specific chemistry, and the nylon shell plus synthetic insulation means the wrong approach can set a stain permanently or delaminate the quilted layers.
Stain-by-Stain Playbook
Work from the outside of the stain inward so you do not spread it. Blot, never scrub aggressively, abrasion pills the nylon face. Always test any treatment on a hidden seam allowance first.
| Stain | First Move | Avoid |
|---|---|---|
| Mud / dirt | Let it dry, brush off the crust with a soft-bristle brush, then cold-water spot clean | Scrubbing wet mud deeper into the weave |
| Blood | Cold water and a drop of mild detergent, blot from the edge inward | Hot water, it sets protein stains permanently |
| Grease / oil | A small amount of dish soap worked in with fingertips, then rinse cold | Hot water, which spreads the oil |
| Pine sap / tar | Isopropyl alcohol on a cotton pad, dabbed, not poured | Rubbing alcohol on camo prints without testing first |
| Mildew spotting | Oxygen-based (non-chlorine) sanitizer per label dilution | Chlorine bleach |
| Ink | Isopropyl alcohol, blotted, working outward | Scrubbing, which drives ink into the quilting |
After any spot treatment, rinse the area thoroughly with cold water and dry it fully. Detergent residue left in a spot-treated area attracts new dirt and can leave a visible ring.
Field Repair of Damaged Stitching
Woobies snag. Tie points, zipper ends, and the quilted stitch lines take the most abuse. A pulled seam does not mean the liner is done, it means it needs ten minutes and the right materials.
What to carry in a repair kit:
- Heavy-duty nylon thread (bonded nylon, size 69 or similar) in a color matching the shell
- A curved upholstery needle, easier to work through quilted layers than a straight needle
- A small seam ripper for cleaning up frayed edges before stitching
- A few inches of nylon webbing or ripstop patch material for reinforcing a torn tie point
Basic seam repair sequence:
- Stop the fray. Trim loose threads with the seam ripper so they do not tangle in the new stitch.
- Backstitch at both ends. Start about half an inch before the tear and end half an inch past it. Locking stitches at each end prevent the repair from unraveling.
- Match the original stitch line. Follow the existing needle holes where possible, punching new holes weakens the shell.
- Do not over-tighten. Cinching the thread puckers the quilted pattern and creates a stress point that will fail again. The stitch should lie flat against the fabric.
- Reinforce tie points with a patch. If a corner tie or zipper end has torn through, back the area with a small square of ripstop or webbing and stitch through both layers.
Zipper and hardware checks: Inspect zipper pulls, head-port closures, and stuff-sack attachment points at the same time you inspect the fabric. Hardware fails before the shell does, and a broken zipper pull is far easier to replace at home than in the field.
How Often to Wash and Storage Best Practices
Wash your woobie blanket every three to six months with regular use, or after any trip where it got wet, muddy, or sweaty. Overwashing wears the shell faster than dirt does, so don't treat it like a bedsheet.

For storage:
- Confirm the liner is completely dry
- Fold loosely rather than compressing it tight
- Store in a breathable cotton bag, not a sealed plastic bin
- Keep it out of direct sunlight and damp basements
- Add a cedar block or silica packet to deter pests and moisture
If you're packing for a bug-out bag, a stuff sack is fine short-term. For long-term storage, loose folding preserves the loft of the synthetic insulation.
Conclusion
A poncho liner is one of the few pieces of gear that earns its place in every kit, and it deserves care that matches how hard it works. When you're ready to replace a worn liner or add a second one to your setup, Dragoon Unlimited builds field-tested options like the Trail Rider™ Olive Drab Poncho Liner and the Trooper MultiCam Poncho Liner, both with zippered head ports and stuff sacks included. Every purchase supports veteran organizations, and our gear is built for people who use it, not just photograph it. Sign up for our newsletter for 10% off your first order.
Frequently Asked Questions
Does washing a woobie blanket make it lose its warmth?
No, as long as you wash it correctly. The synthetic insulation in a poncho liner keeps its thermal properties when you use cold water and a gentle cycle. Heat is what damages the insulation, so avoid hot water and high-heat drying. Tumble dry low or line dry to protect the quilted pattern and moisture-wicking performance. With proper care, your woobie will stay warm for years.
Can you put a 100% polyester blanket in the washer?
Yes, most 100% polyester blankets like a military woobie can go in a front-load washer on a delicate setting. Use cold water and a mild detergent to protect the nylon shell and synthetic insulation. Avoid agitators found in top-load machines, which can snag the fabric. If your woobie has zippers or a headport, zip them closed before washing to prevent snagging.
How do you remove stains from a synthetic poncho liner?
Treat stains as soon as possible. For mud or dirt, let it dry, then brush it off before washing. For grease or oil, apply a small amount of mild detergent directly to the spot and gently rub with a soft cloth. Avoid harsh chemicals or bleach, which break down the durable water repellent finish. Wash on a gentle cycle with cold water and check the stain before drying.
Should you air dry or machine dry a woobie blanket?
Both work if you use low heat. Tumble dry low is convenient and helps fluff the insulation, but line dry or air dry is safer for the fabric's lifespan. Never use high heat, which can melt synthetic fibers and damage the quilted pattern. If you machine dry, use a low setting and remove the woobie while it is slightly damp to avoid overdrying.


